Showing posts with label Christmas Decor. Show all posts

Friday, January 28, 2011

My Mercury Glass Look

I am loving the fresh white winter look with splashes of sparkle from silver, crystal, and mercury glass. I have seen several techniques for that imperfectly perfect look of mercury glass and choose to use one for myself. If you want to try it, all you need is silver spray paint, spray bottle with water, and your glass pieces.
I had picked up this glass Christmas tree from a thrift store for $.75 and had a clear glass ornament leftover from previous projects. I also had a clear glass window pane I took out of a patio door to make it into my headboard. That is a project I keep meaning to take pictures of to show you. One of these days… Anyways, here is the window pane freshly sprayed. All you do is sprits the glass with water and then spray on the silver spray paint. It makes the paint stick differently depending on the concentration of water giving you nice textures.
I was really just using the window pane to test out the technique but now I like to use it to put other display pieces on top off. Basically what I found was that flat open piece like this works easier than anything else. Trying to spray into anything makes a mess on your hands. (Gloves aren’t a bad idea).
I also found that I like the look on the side you actually spray on rather than the other side. Looking through the glass to the spray paint really flattens the color and texture which was a problem on the tree and ornament. I tried to spray some of the paint in a bowl and then use a small paint brush to flick some paint onto the outside but that didn’t really work so don’t bother to try that.

So what am I going to do different next time?
  • I am not going to bother to try to spray into the ornament but just do the outside. But I do like seeing the thickness of the glass on the tree so I think I would do a light layer inside and out.
  • Use acetone or something else that will take some of the paint off just after it is dry to give a better texture and splotchy look. This is supposed to give you a more antiqued look.
  • Krylon’s mirror finish spray paint is supposed to work well for this so I want to try that.
But really, I like the pieces I made and enjoyed using them through out Christmas. The window pane is still out and probably will be for a while. I might even make a few more of those. You will notice it still has the putty from the windows stuck on it. I think it adds to the texture quite nicely. Or at least that is what I am going with for now.

This post is linked to:

Sumo Sweet Stuff

Thursday, December 16, 2010

A Sparkly Silvery Wreath

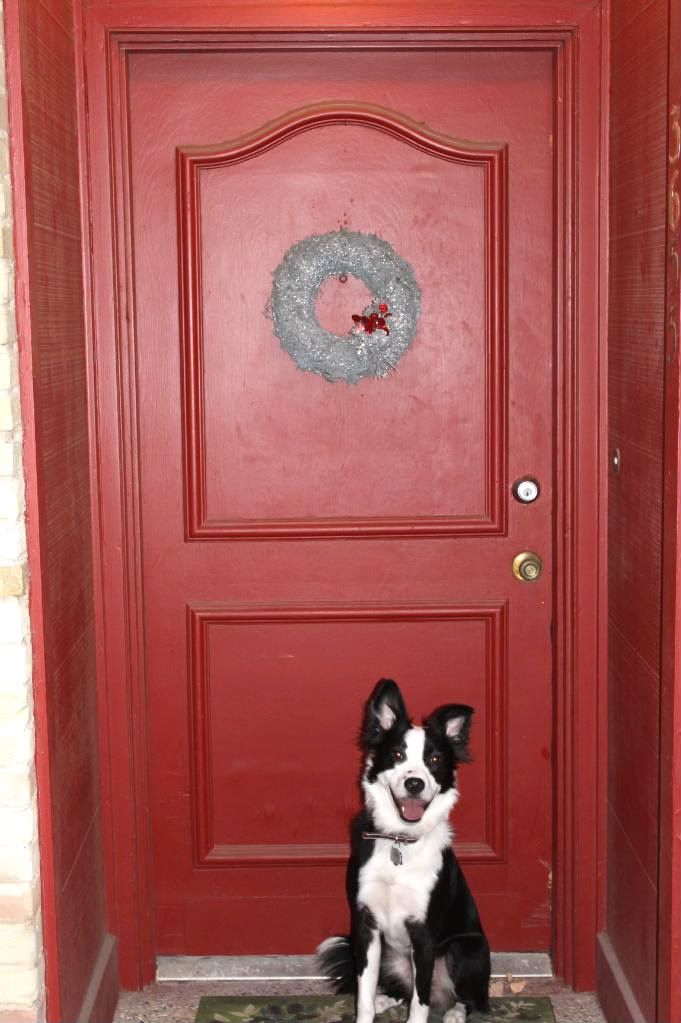
You may remember (okay probably not) that I got a wreath form from a thrift store for $2.75 a while back. Well, that wreath form is now wrapped in sparkly silvery snowy goodness. See?
 I needed something fairly simple to go with our red door, and red siding and red trim, and red... I really like red and I love how the parts of the house I can see out the windows coordinates with the decor inside so I am not complaining but it does require any adornments kept simple.

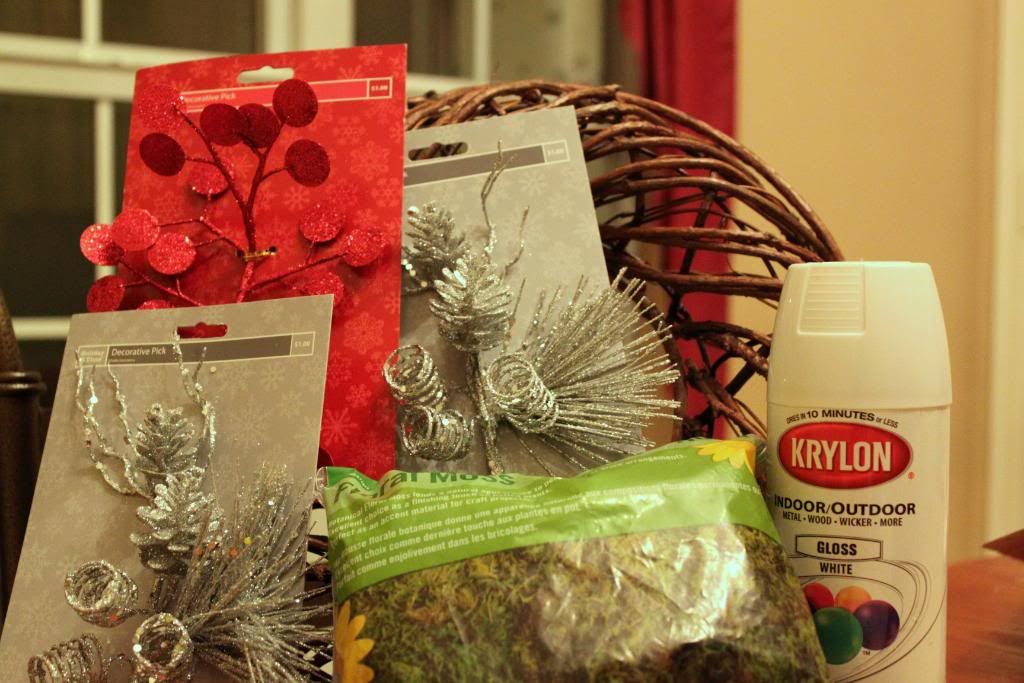
To make this wreath I used the following which cost me about $9:
  • Grapevine Wreath Form - $2.75
  • White Spray Paint - leftovers
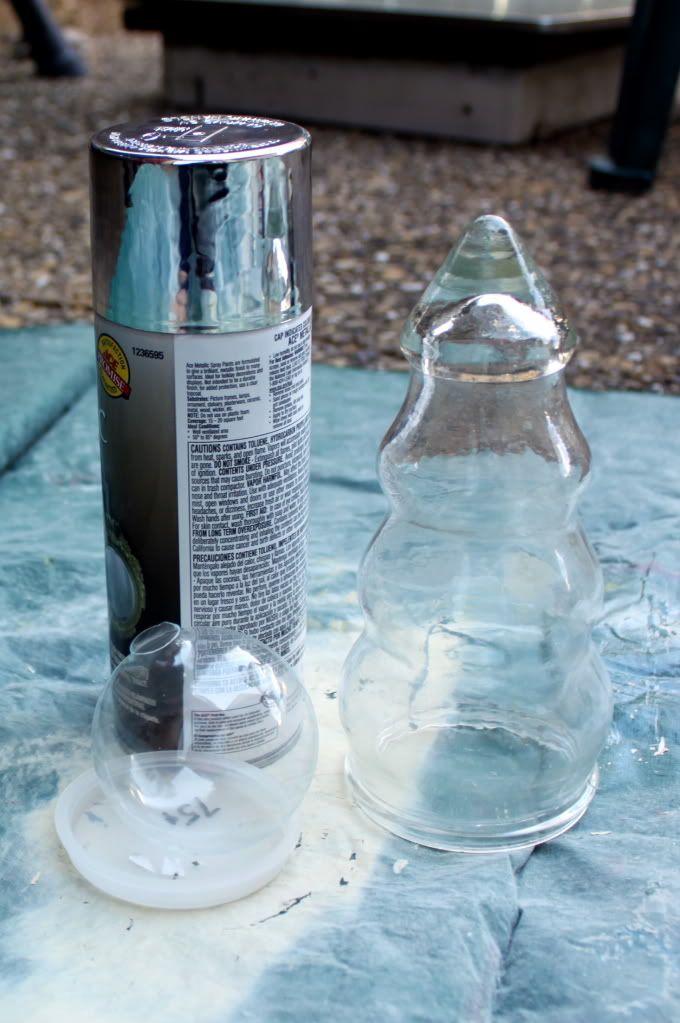
  • Silver Spray Paint (it is holding up the wreath form in the picture) - shared with other projects so lets say $2
  • Floral Moss - $2 bag
  • 3 Sparkly Accents - $.75 each
  • Glitter
  • Hot Glue Gun
  • Wire Cutters  
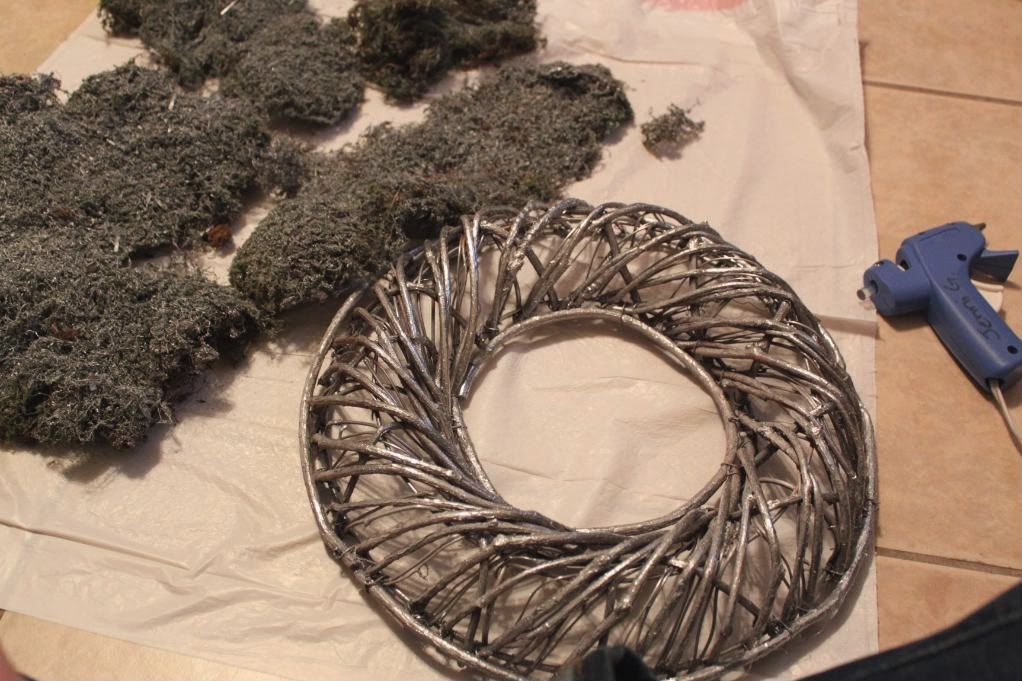
First, I spray painted the wreath form and the moss. I painted about a bag and a half of moss but only used about 1 bag on the actual wreath. (Moss leftovers are very nice to have around)

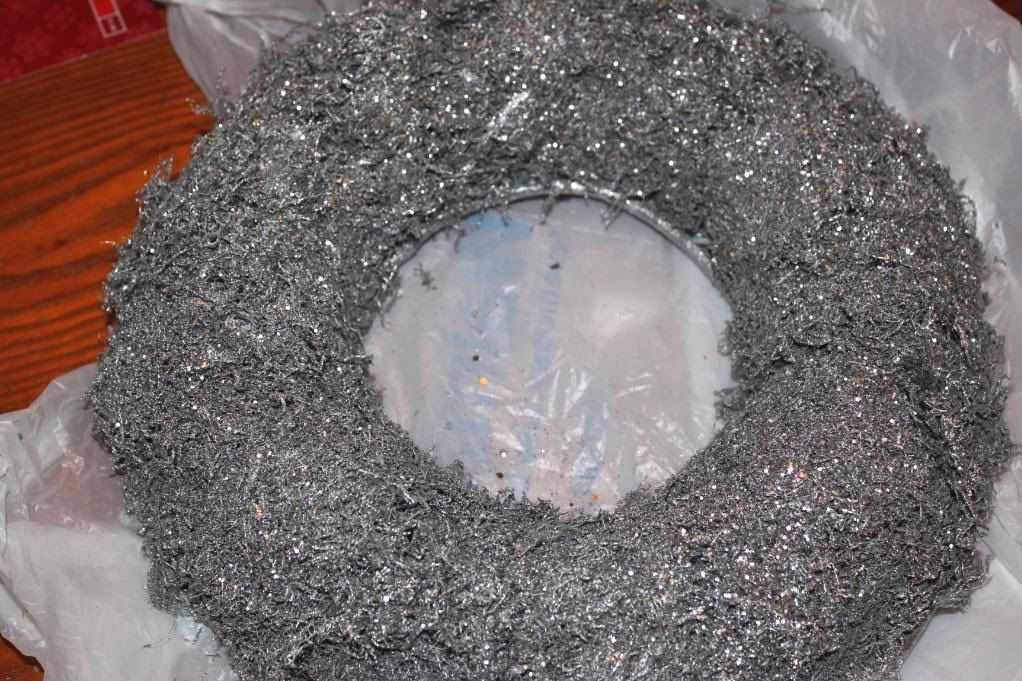
I used the white first as a base. I was hoping that as I played with the moss and put it on the wreath form that the white and moss colors would show through in some areas giving it a snowy, natural appearance. I ended up putting so much silver on it later that I lost my snowy look but I think the idea is still good.
 
Once everything is dry, I plugged in my glue gun, and got to covering. I recommend working on top of a trash bag or something easy to pick up. The moss can be pretty messy.  I just put off a small section of moss, slathered hot glue on the back, and stuck it to the form until I got this:
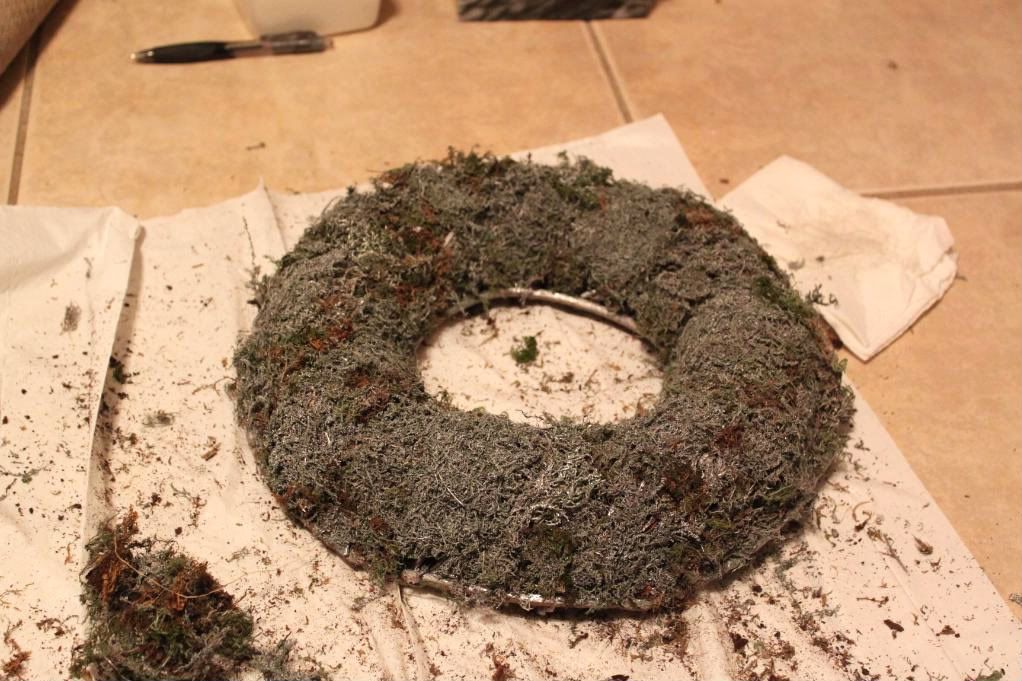
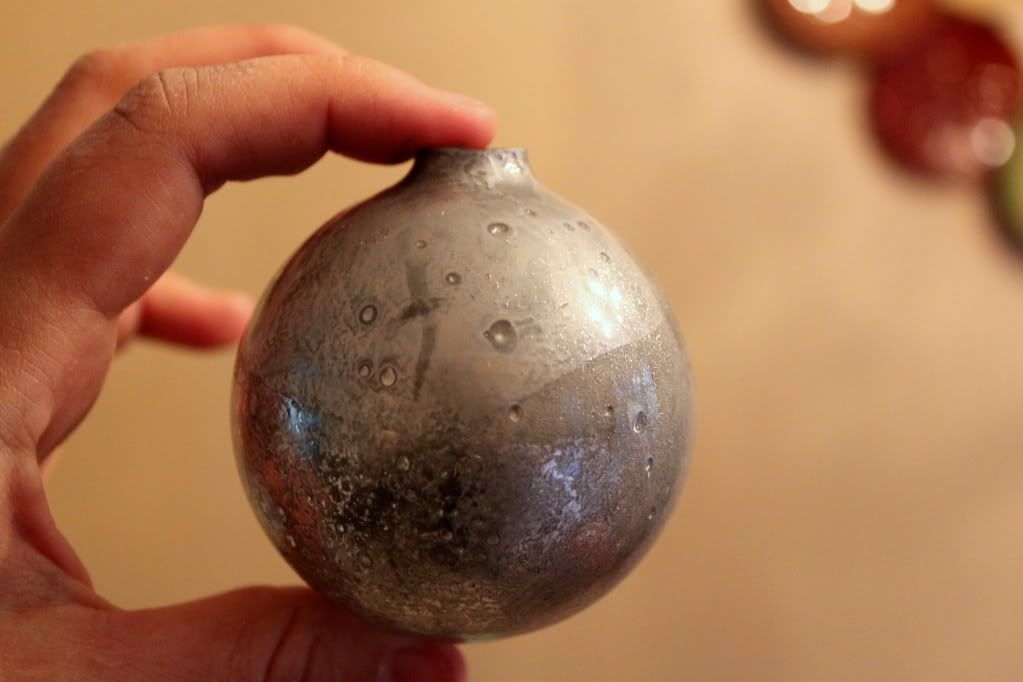
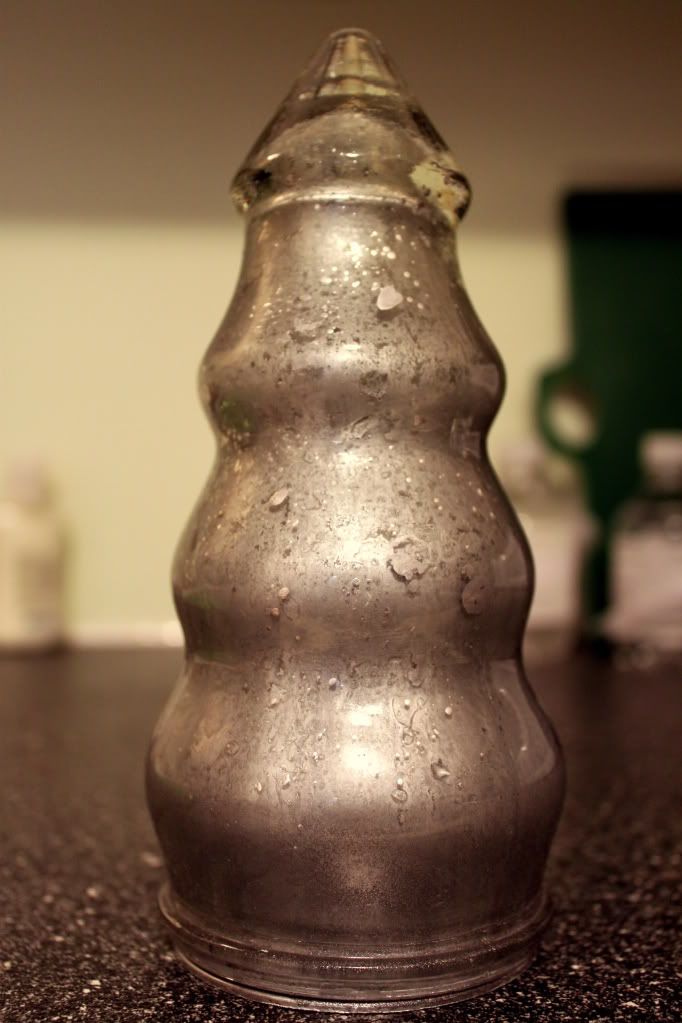
At this point, I decided it looked more dirty than silvery and snowy, so I took it back outside to add one more light coat of silver spray paint. I also decided it needed glitter, so while the paint was wet I sprinkled a very special mixture white and clear glitter on it all. (This look can only be achieve by storing your glitter together in a Ziploc bag and having it spill. A lot.)  It was working until I sprayed a clear coat on top of everything. I was trying to hold the glitter on better but it ended up changing the color of the silver. It became a much more industrial metal gray instead of pretty sparkles. It also made the glitter look odd and chunky. No worries, I just put another coat of silver on it and gave up on any snowy ambitions.
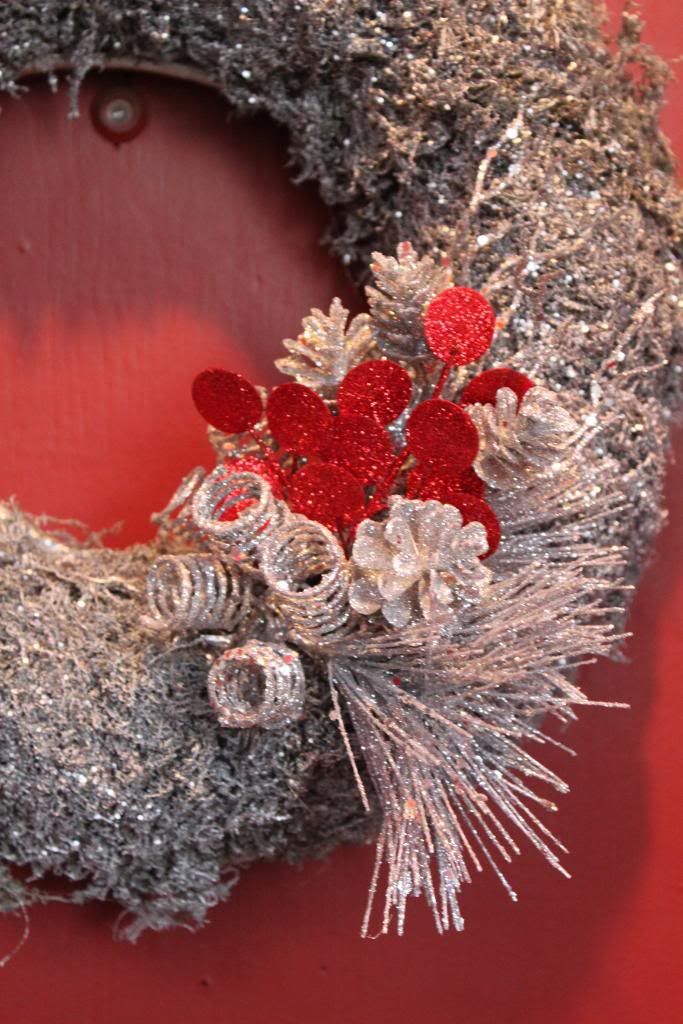
 Next, I took two of my decorative accents and nestled them within each other. Aren't they cute all nestled?  Then I just poked a hole in my moss and pushed them through bending them stems as needed to make it all lay down nicely.
I used wire cutters to cut the red bits off of their main stem so that they are easier to poke into the arrangement and then hot glued it all in place.
 I twisted on a wire off one of the silver accent's packaging and hung it on the nail in our front door (thanks previous tenants!) TaaDaa!
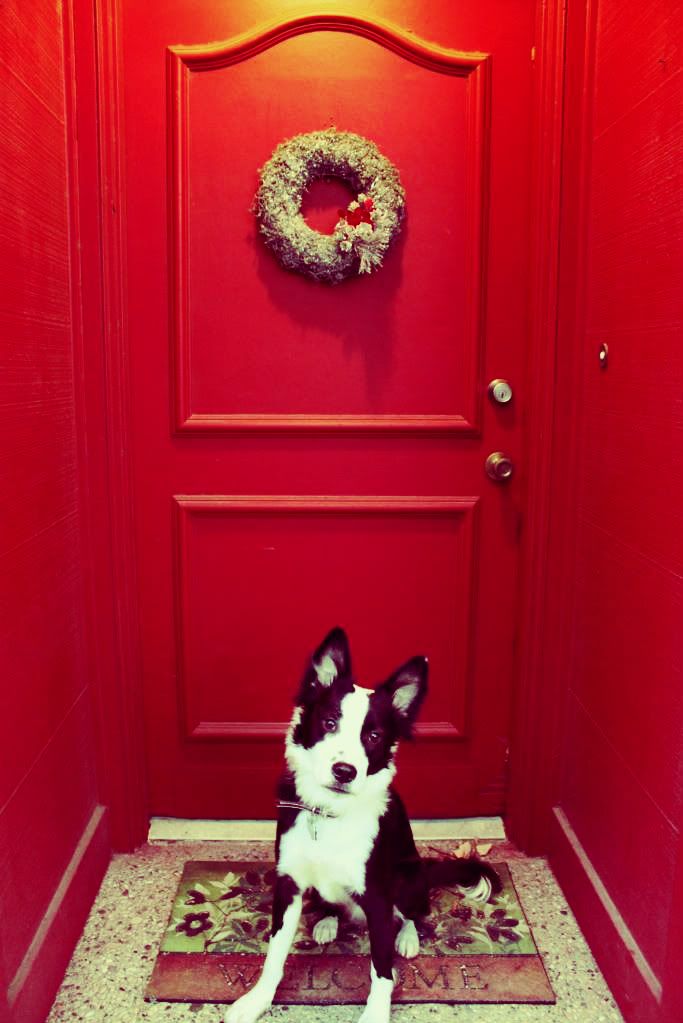
And because you haven't had to look at nearly enough pictures of Desmond yet:
Don't they look good together? I got a little artsy on the coloring of this next one:
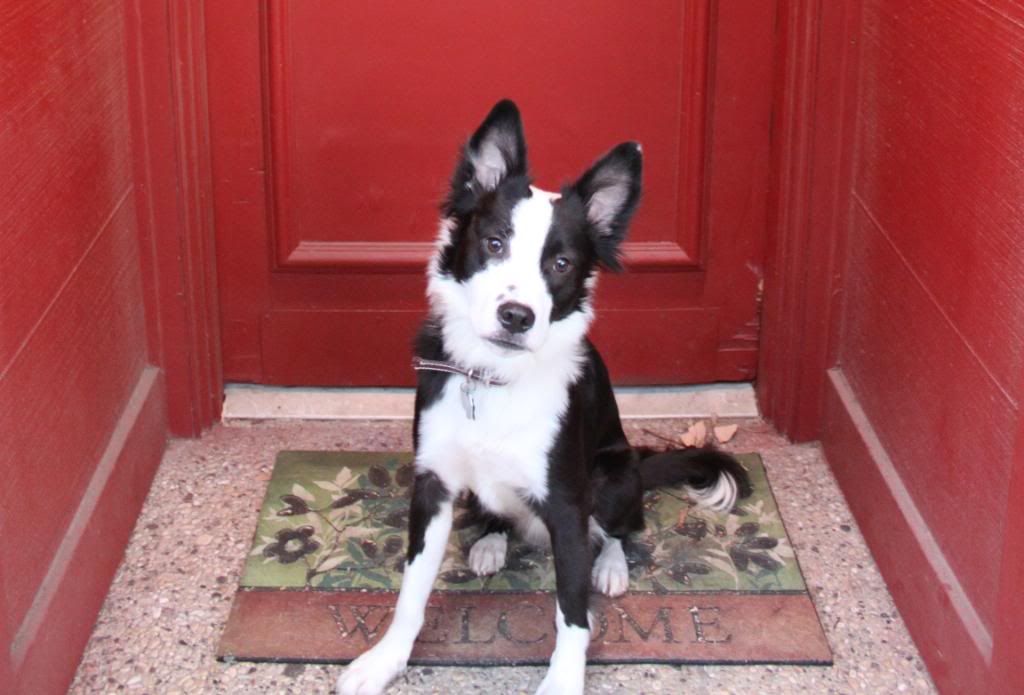
Doesn't that face just say "Mommmm! Can I have my treat yet?" Here it is close up in case you cant hear/see it from that far away. That is the same sad puppy dog look that got him a home in the first place.
 I will be linking this post to the DIY Clubs monthly contest.
DIY Club

Monday, December 13, 2010

Noel NoooeeeELLL! Born is the King of Israaaellll!

Are you glad you just have to read that title and not actually hear me sing it?
I have a quick little Christmas project for you today. I got this cute little candle holder for $2 not long ago. It isn't terrible as is but I wanted more from it.


I love red and had to buy a can of red spray paint for another project so it got a coat too. I didn't prime it or anything, just started spraying. Here it is after the first red coat.
Looking good. Looking good but not done yet. I wanted to darken the red and bring out the details so I wiped on a dark brown miss-tinted stain from Sherwin Williams ($2.50 for the quart!) and then rubbed it back off. I was impatient so I only let the paint dry to the touch but not really cure when I started applying the stain. Combine that with the fact that I didn't prime the surface and you get the paint coming off of the areas you rub real hard. Not really surprising. I decided to go with it and I think it turned out nicely.

Not bad for a $2 candlestick and about $1 of supplies. I painted another set of candlesticks the same red but haven't rubbed them with the stain yet. They aren't white underneath and a different style and material so I am hoping the paint doesn't come off those but we will have to see.